
Overseed vs. Reseed: Your Seasonal Lawn Recovery Guide
Your lawn doesn’t need a time machine—it needs the right season and the right seed. Patches, thinning, and tired turf don’t have to linger; with a focused strategy, the grass you already have can become the foundation for a fresh, resilient surface. The key decision is simple yet strategic: overseed to thicken what’s there, or reseed to start over where the turf has failed.
Water is the heartbeat of establishment, and smart use matters. According to EPA WaterSense, residential outdoor water use in the United States accounts for nearly a third of household consumption, much of it for landscape irrigation. That makes efficient practices during recovery a win for both your lawn and your water bill.
What follows is a season-by-season, decision-ready guide for choosing overseeding or reseeding, selecting seed that fits your climate and lifestyle, and executing a plan that sticks—from soil prep to first mow to long-term resilience. No fluff, no gimmicks, just the steps that move a lawn from “meh” to “mowed with pride.”
Overseeding vs. Reseeding: What’s the Real Difference?
Before you touch a spreader, clarity matters. Overseeding and reseeding both use seed, but they solve different problems. Overseeding adds new seedlings into an existing lawn to improve density, color, and diversity. Reseeding is a renovation—removing or replacing failed turf and building a new stand, either in targeted areas or across the entire yard.
Overseeding is best when 60–80% of the lawn is still alive, but thin. It refreshes aging turf genetics, adds disease-resistant cultivars, and fills in small bare spots. Reseeding makes sense when weeds dominate, shade or traffic has overwhelmed the species you have, or you’re switching grass type (for example, to a more drought-tolerant blend). Think of overseeding as a tune-up and reseeding as an engine rebuild.
A clear decision prevents wasted effort. If you choose overseeding where the soil is compacted and the stand is only 20% alive, you’ll spend more on seed and water for marginal results. If you reseed a mostly healthy lawn, you’ll overpay and overwork. With the “what” sorted, the “when” becomes the multiplier for success.

Timing by Grass Type and Climate
Season matters because grass is a living system with specific germination windows. Cool-season grasses (Kentucky bluegrass, perennial ryegrass, tall fescue, fine fescue) thrive when soil and air are moderate; warm-season grasses (Bermudagrass, zoysiagrass, St. Augustinegrass, centipedegrass) prefer heat for establishment. Matching your action to your species, garden styles, and local weather pattern raises germination and lowers weed pressure.
Cool-Season Lawns (North & Transition Zone)
- Prime window: Late summer to early fall. Warm soils speed germination, while cooling nights reduce stress. Less annual weed competition improves take-rate.
- Backup window: Early spring, accepting slower establishment and higher weed pressure.
- Best use: Overseeding to thicken, or reseeding after summer stress or disease.
Warm-Season Lawns (South & Warm Transition Zone)
- Prime window: Late spring through early summer once soils are warm.
- Dormant overseed (optional): In some regions, ryegrass is overseeded into Bermuda for winter color, then fades as summer returns.
- Best use: Reseeding or plugging/sodding thin areas when heat supports growth.
Well-timed seeding means less watering and less frustration. With timing locked in, your next step is choosing the approach that matches the lawn you actually have—not the one you wish you had.
Diagnosing Your Lawn: Quick Ways to Choose the Path
Good choices come from good observation. Take 30–45 minutes to walk the yard, note patterns, and score what you see.
- Density check: If more than 60% of each area is living turf, overseeding is efficient. Below that threshold, lean toward reseeding.
- Weed load: If weeds exceed ~25–30% of what you see, reseeding after control is the cleaner route.
- Soil compaction: A screwdriver should slide 3–4 inches with moderate pressure. If not, aeration is non‑negotiable before overseeding.
- Sunlight reality: Four hours of direct sun supports many cool-season grasses; warm-season species often prefer more. Deep shade may call for shade‑tolerant fine fescue or a rethink of expectations.
- Traffic patterns: Pet runs, play zones, and gate hotspots wear differently. You may mix strategies: overseed the whole yard, reseed the worst paths.
A simple snapshot of conditions directs you to the right work, at the right intensity. Once you know which path fits, you can match seed to environment instead of guessing.
Seed Selection That Matches the Mission
The best seed is the one that fits your climate, maintenance appetite, and sun exposure. Blends can balance strengths: disease tolerance, drought performance, color, and texture. Read the label—purity, germination rate, and weed seed content matter more than the brand name.
- Cool-season favorites:
- Tall fescue (including turf-type): durable, deeper roots, handles heat better than other cool-season types.
- Perennial ryegrass: rapid germination, excellent color, ideal for quick thickening.
- Kentucky bluegrass: self-repairing via rhizomes, rich color, slower to establish but great long term.
- Fine fescues: strong in shade, low fertility needs, soft texture.
- Warm-season choices:
- Bermudagrass: high traffic tolerance, thrives in heat and sun.
- Zoysiagrass: dense carpet, lower mowing frequency once established.
- Centipedegrass & St. Augustinegrass: low to moderate maintenance in appropriate climates; often installed as plugs or sod rather than seed, depending on variety and region.
Selecting with purpose gives your watering and fertilizing a real chance to pay off. With the right seed in the bag, prep becomes the lever that flips results from “so‑so” to “standout.”
Soil Preparation Essentials (Where Success Is Won)
Great seed scattered on unprepared soil is like paint on dust: it doesn’t stick. Preparation ensures seedlings meet soil, air, nutrients, and moisture without fighting thatch or compaction. Start with a soil test if possible; it guides pH correction (lime or sulfur) and nutrient needs. Remove debris, mow low to expose the crown zone, and bag clippings to get rid of excess material.
Address thatch layers over ½ inch by dethatching or power-raking. Then target compaction. Core aeration pulls plugs 2–3 inches deep, opening pathways for air and roots; topdressing lightly with finished compost after aeration improves seedbed structure. As Lawn John likes to say, “Seed‑to‑soil contact is king.” Rolling or lightly raking seed into loosened soil makes those words true.
When you can see seed nestled against particles—not perched on fluff—you’ve set the table for germination. With the surface ready, spreading becomes a predictable, not hopeful, exercise.
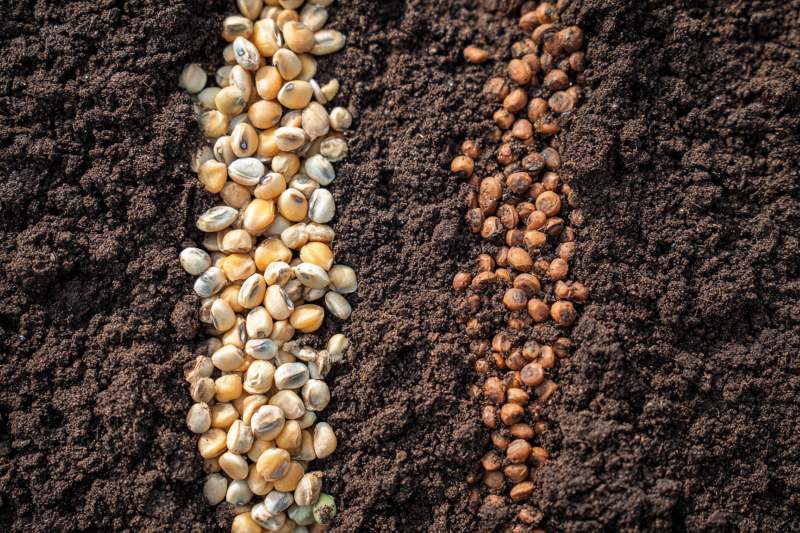
Spread Strategy: Rates, Patterns, and Coverage
Consistency beats speed on seeding day. Use a calibrated broadcast or drop spreader and work in a crisscross pattern—half the seed north–south, half east–west. This evens out human error and avoids stripes. Rake lightly so seed sits ⅛–¼ inch deep (most turf species prefer shallow placement). If birds are active, a very thin mulch layer (straw without weed seeds or clean peat) helps hold moisture and reduce losses.
General rate ranges are printed on every seed bag; follow them for overseeding vs. renovation. Overseeding rates are lower because existing plants help fill space. Renovation rates are higher to quickly achieve canopy closure and shade the soil, reducing weed opportunity. After spreading, a light roll sets seed into contact without burying it too deeply.
A steady hand now means fewer fixes later. With seed down, the job shifts to water—the habit that decides whether sprouts become turf or just a few green freckles.
Watering & Aftercare: The Schedule That Actually Works
Early-stage seedlings have tiny reserves and shallow roots. They need frequent, gentle moisture—not “a drink,” but a persistent hug. Think light, even misting that keeps the top ½ inch damp until germination, then transition to deeper, less frequent sessions as roots lengthen. As veteran sports turf managers say, “You can’t water yesterday.” Plan ahead of wind and heat, and taper as establishment progresses.
A practical pattern many homeowners use:
- Days 1–10 (or until you see uniform sprout): 2–4 light waterings per day to keep the seedbed constantly moist without puddling.
- Days 11–21: 1–2 slightly deeper waterings per day to push moisture below the surface and encourage roots.
- Days 22–35: Water every other day, deeper still, watching for footprints that don’t bounce back as your cue to water.
- Beyond 5–6 weeks: Shift toward a normal deep-and-infrequent schedule based on weather and soil type.
Moisture management lays the foundation; nutrients and mowing build the structure on top. That’s where the next phase earns its keep.
Fertility and First Mow: Timing That Protects Seedlings
Seedlings crave phosphorus for root development and a balanced touch of nitrogen for early growth. A starter fertilizer labeled for new seeding is designed for this stage—apply at the bag’s new‑lawn rate during or shortly after seeding. If your soil test shows low phosphorus or pH outside the target range for your species, correct with the recommended amendments.
Hold your first mow until most seedlings reach your target cutting height, then remove only the top third of the blade. Sharp blades matter; tearing young tissue invites stress and disease. Mowing at the correct height for your grass type quickly produces a self‑shading canopy that retains moisture and discourages weeds.
Once the stand tolerates regular mowing, you’ve turned a corner. Keep that momentum by managing weed pressure without sabotaging new roots.

Weed, Pest, and Disease Pressure During Establishment
Every seeding window overlaps with something trying to move in: crabgrass in spring, broadleaf weeds in fall, fungal stress whenever conditions line up. Most pre‑emergent herbicides interfere with germination, so avoid them unless the label explicitly allows seeding. Techs at Insectek Pest Control emphasizes post‑emergent pest control and weed control should also wait until seedlings are mature enough per product directions.
Cultural practices are your best defense early on: correct mowing height, even watering, improved airflow, and that rapid canopy you’re building. If disease shows (e.g., damping‑off in overly wet seedbeds), ease off water and improve morning dry‑down. Pests like grubs can thin new stands; monitor and manage based on confirmed activity, not guesswork.
Keep the focus on vigor. Healthy new turf quickly outcompetes opportunists, which leaves you free to refine efficiency—especially how you tackle the work in a tight weekend window.
A Two‑Day Weekend Blueprint (Overseed or Reseed)
Sometimes you just need a plan you can execute between breakfast and dinner—twice. This blueprint assumes you’ve already picked your season and seed type.
Day 1
- Mow low and bag to expose crowns.
- Dethatch if needed and clean up debris.
- Core aerate compacted areas; rake plugs after drying or leave to break down.
- Topdress lightly with screened compost to level and enrich.
- Spread starter fertilizer at the labeled new‑lawn rate.
Day 2
- Broadcast seed in a crisscross pattern; rake lightly into contact.
- Protect with a thin mulch layer if birds or wind are a problem.
- Roll lightly to set seed.
- Begin the frequent‑light watering schedule.
- Flag sprinkler heads and mark paths to reduce traffic on new zones.
By Sunday night, your work is in the ground and the schedule is on the fridge. That rhythm carries you through the next few weeks and into results you can see.
Troubleshooting Thin Germination and Bare Spots
Even good plans meet real‑world variables—uneven shade, clay patches, dog runs, or a windy week that dried the seedbed. Tackle hiccups early so they don’t become chronic weak points.
- Uneven sprout: Rake rough spots, scratch in a touch of compost, and spot‑seed. Increase light watering in those zones for 7–10 days.
- Bird or wash loss: Reapply seed and use a thin mulch to anchor.
- Compaction returns: Aerate again in the next prime window, then overseed lightly.
- Shade stress: Switch to a shade‑tolerant fine fescue mix, raise mowing height, and reduce traffic.
- Weed surge: Hand‑pull early, then use labeled products only after seedlings reach maturity thresholds.
Solving small problems quickly keeps your recovery curve steep. The final piece is long‑term resilience—so your lawn stays thick without demanding constant rescue.
Thick Today, Durable Tomorrow: Practices That Last
Once the stand is established, shift from “rescue mode” to “resilience mode.” Mow at the correct height for your grass type; a slightly higher cut often pays dividends in drought tolerance and weed suppression. Feed lightly and regularly according to regional guidance, with an emphasis on slow‑release sources in growing seasons. Deep, infrequent irrigation trains roots to explore soil rather than sit near the surface.
Diversity is insurance. Overseeding annually with a complementary cultivar refreshes genetics and hedges against disease cycles. If your lawn includes heavy‑use corridors, consider integrating stepping stones, mulch paths, or durable groundcovers to offload wear. Strategic shade pruning and seasonal aeration keep the soil–root–shoot system breathing.
With sustainable habits, you’ll spend less time fixing and more time enjoying. That’s the real point of all this green work.
Budget, Tools, and Where to Splurge
You don’t need a commercial truck to execute a pro‑level recovery. A decent broadcast spreader, a rental core aerator (for larger lots), a sharp mower blade, and a hose‑end timer can transform outcomes. Splurge on high‑quality seed with clear labeling and on compost for topdressing; both yield returns you can actually see in density and color.
If you have an in‑ground system, consider upgrading to a weather‑responsive controller and high‑efficiency nozzles; if not, simple multi‑zone timers and drip/micro‑irrigation rings around edges reduce waste. Hand tools—steel rake, flat shovel for leveling, lawn roller—are one‑time buys you’ll use for years.
Invest smartly where it counts and keep the rest simple. The right gear supports the habits that protect your results.
Expert Tips That Change Everything
A few small adjustments often deliver outsized gains. Keep these on the fridge next to your watering plan.
- Set a mowing rule: never remove more than one‑third of the blade.
- Edge first, then mow; the visual clean‑up helps you spot thin zones for touch‑up seeding.
- Stagger your seedings by a week on large areas to reduce risk and spread watering load.
- Mulch‑mow leaves in fall on cool‑season lawns to add organic matter and protect seedlings.
- Test once, amend wisely: pH corrections unlock fertilizer efficiency and root growth.
These habits turn good turf into great turf, season after season. Now, tie it all together with a forward‑looking mindset.
From Bare Patches to Backyard Pride
Choosing between overseeding and reseeding is less about emotion and more about fit: the living percentage of your stand, your season, your grass type, and your willingness to prep the soil well. With timing aligned to your species, quality seed on a prepared surface, a measured watering plan, and steady first‑mow discipline, a thin lawn becomes a thick, color‑true carpet that holds up to life.
Long‑term success is about small, repeatable habits—height‑right mowing, deep and occasional irrigation, seasonal aeration, and a light genetic refresh through periodic overseeding. Put those habits on autopilot and the lawn stops needing heroic saves; it just performs. With the next prime window on the calendar, what’s the first small step you’ll take to set your turf up for a season of wins?

Copyright © 2026 All rights reserved by Heart's at Home